Hi, welcome to our friendly user guide for updating your website via the CMS. CMS stands for Content Management System, and is used by various websites, including Studious Media.
The guide below will illustrate how to update a website which is powered by a Wordpress CMS. As a bonus, we also included a tutorial for using a Jigoshop plug-in, for all you e-Commerce websites out there.
Updating your website, CMS Style
Log In
On
your browser, go to your website. Go to the page you wish to update and leave
it open.
Open
a new tab, (Ctrl+T, Comd+T on Mac) and go to the log in link your web developer has provided you.
Please
type in your EXACT website name; you could be www.yourwebsitename.sg instead of
www.yourwebsitename.com. Various examples as below:
www.yourwebsitename.sg
www.yourwebsitename.com
www.yourwebsitename.com.sg

Enter your username and
password
Your
username and password are generated by your web developer. You are advised NOT to change any of
them until you are fully comfortable with using the CMS.
In
the case you've changed your password and forgot it, there is a ‘Lost your
password’ link below the log-in form which you can click. We will cover this
portion in the Help/FAQ section later.
Navigating the Dashboard
After
logging in, you should see something like this:

Click
on the pages button, and you will see all of the pages that are on your
website.

Choose
the page that you wish to update. If it is about us, click on about us. If it
is contact us, click on contact us.
We
DO NOT RECOMMEND changing any of the page names unless you are very sure what
you are doing.
Updating The Content
Changing Text
In
the following pictures, I will be changing the portion which says ‘Change This
Text.’


When you first open up the page, it may be displayed like this. The
text tab is used if you wish to type in certain codes. However, you will be
able to see better using the visual tab, so click on that instead.


We will be changing it to ‘Lorem Ipsum.’
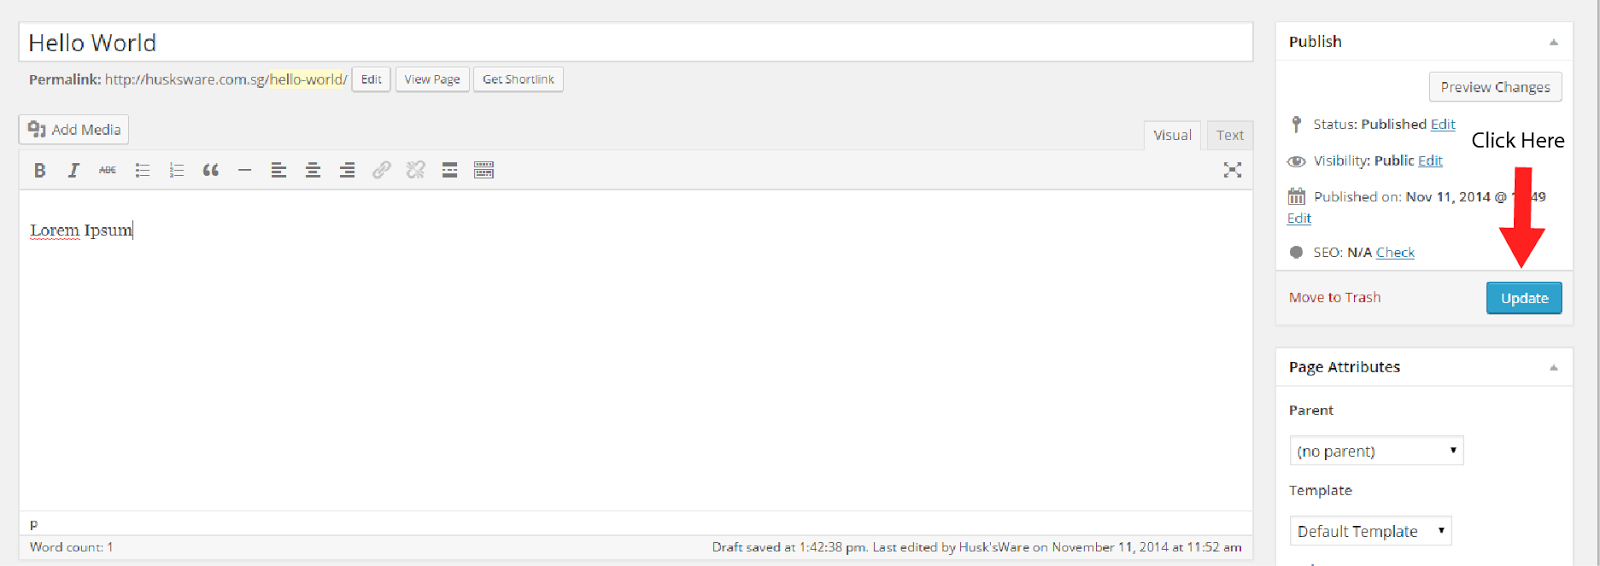
The text has been changed to ‘Lorem Ipsum’.
You
can do multiple changes before updating if you wish to, but REMEMBER TO UPDATE
after you’re done.
Changing Images
In
the following pictures, I will be changing the image ‘Time for Change’


When you first open up the page, it may be displayed like this. The
text tab is used if you wish to type in certain codes. However, you will be
able to see better using the visual tab, so click on that instead.

Click the Add Media button.


Click on the Select Files button.
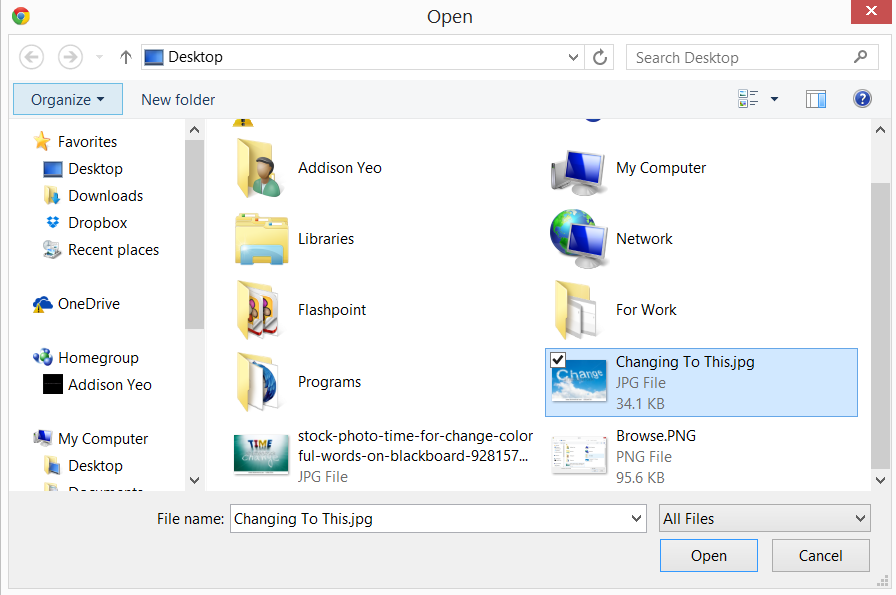

The
image is now uploaded. Click on Insert into Page at the bottom left hand corner
of the box.

When you’re done with the
changes, click on the update button and wait for the page to reload. After
that, go to your website and hit refresh to view the changes.

The image has been changed.
You
can do multiple changes before updating if you wish to, but REMEMBER TO UPDATE
after you’re done.
You
are advised to only upload images that are taken by you, or bought to avoid any
copyright issues.
Using The Jigoshop Plugin
Source: Jigoshop Knowledge Base
Adding products into your shop

Navigate to Products>Add Product


Under Product Data>Product Type,
choose a Simple product type.

Product Data>General tab.
Here you can decide on its visibility, if it’s a feature product or not, the
price and you can set a sale price if you are having a sale.

Product Data>Advanced tab.
Here you are able to set the tax status and class specific to that product, the
weight and dimensions and if the product can be personalised. This is an
optional step.

Product Data>Inventory tab.
Here you can set if you want the store to handle the stock for you and if so
how much stock you have also if the product is in stock.
*Optional: Product Data>Attributes tab. This is mainly used if you are using variable
products, but if you just want some simple text attributes you can do so here.
Beneath Product Data you will find an Excerpt
box. Here you can set an excerpt for your products, some themes will show the
excerpt and others won't.

To set a primary photo that
will appear in the catalog pages and first on the product detail page, click on
Set featured image and upload your
chosen image.

If you want to add additional
pictures of the same product, click on Add
Media just above the Description box to upload.
Upon
successfully uploading your photos, simply close the pop-up by clicking on the X. DO NOT click Insert into post unless you want the photos to appear in the
description.

You are now ready to publish
your product!
Creating Products with Options (Variable Products)
Introduction
Variable
Products is a name for any products which allow a customer to select from
different product options as part of their purchase. They may also be referred
to as "Configurable Products".
Jigoshop
allows you to create an unlimited number of options for any product by using
"Attributes" to set a range of options. These are set at a Taxonomy
level, allowing you to apply each set of Attributes to as many products as you
like.

Creating the attributes
The first
step to having variable products is to create the product attributes.

Visit
Products > Attributes
Type the
name of your new attribute, choose Multiselect,
then click Add Attribute.

We'll now
add our various sizes to this attribute. So click on the title of your newly
created attribute.
*Note: Do not click on
"Edit", instead, click the actual name

Fill in the
name and optionally a slug (slug is automatically filled out) then click Add
New Size. You can leave Parent, and Description blank.

*Note: If you'd like your
variations to show up in a specific
order, use the slug field to handle that. For example, if you
want to display: S M L XXL,
then for slug you would have 01S 02M 03L
04XXL
You should now see something
similar on the right side:

Repeat these
steps for any other attributes you'd like to create. For example, I also
created a Colour attribute (used later in the tutorial).
Assigning attributes to products
Visit your
product's edit page for which you'd like to add variations to, and choose the Variable product type.

Next click
the Attributes tab
and choose your attributes, then click Add
Attribute.

Check Is for variations and click Update or Publish. You can leave Display on product page
unchecked, unless you want it to show up under a new tab on the single product
page next to Description.

All set, on
to the next topic!
Create variations from attributes
Under the Variations tab, click Add Variation
*Note: Your
product must be published to see the Variations
tab

Start
configuring your variations. For example, I'm going to have "Any
Size" and "Dark Green" at a price of 12.99.
To set this
variation's Product Image , click
the Product Image thumbnail and upload your photo, then click Insert into Post


You can
continue adding your variations, or if you're done, be sure to click Update to save the variations
you've just added.

Once you're
finished, view your product to check out what you've just accomplished!
Managing Your Orders
Introduction
There is an
overview of recent orders on the Jigoshop dashboard detailing some basic
information such as the date of the order, how many items were purchased, the
order total and the order status.
Jigoshop
also includes a comprehensive order management suite allowing you to easily
manage your customers orders. This is accessed via the “Orders” link in the
Jigoshop menu.
Order
Statuses
·
Pending - An order has been placed but not yet paid for. For example,
through PayPal.
·
On-Hold - Manual payment methods will automatically be placed on-hold.
You will manually have to process these orders. Usually from the Bank Transfer
or Cheque gateway.
·
Processing - The product has been successfully paid for, just not yet
shipped.
·
Completed - The customer receives a notification that their order is
complete. This usually signifies shipment to be complete.
·
Cancelled - The customer (or admin) cancelled this order.
·
Refunded - The customer (or admin) refunded this order.
Dashboard
The
dashboard can show order statistics and recent orders placed. It's a good idea
to keep track of processing or pending orders so that you can mark those
completed!
- Monthly Sales
- Recent Product Reviews
- Recent Orders
- Stats: Shop Content
- Stats: Orders

All Orders
This page
displays an overview of all orders giving you vital information on each one.
You can quickly and clearly see what status an order has which makes scanning
this content heavy page easy.

Edit Orders
Through the
Edit Order page you can change an order status as you wish. Once it’s shipped,
mark it completed so the customer is aware.

Managing Discount Coupons
Naviagte to
Jigoshop > Coupons


Insert a
title, which will be used as the coupon code after saving. You can also choose
the different type of coupon to issue:
· Cart
Discount –A specified amount discount
applied to the entire shopping cart
·
Cart % Discount
– A specified percentage discount applied to the entire shopping cart
·
Product Discount – A specified amount discount applied only to a product
·
Product % Discount – A specified percentage discount applied only to a product

You can also
configure the coupon as follows:
- Code -
Set the coupon code your customer must use to apply the discount
- Type -
Choose from various discount types that a coupon will apply
- Amount
- The amount this coupon is worth; either a percent or currency value
- ID's -
The only products that this coupon will be valid for. Product ID is used
for this field and it must be separated by commas, eg: 1, 2, 3
- From & To - Effective start and end dates the coupon will be valid for
- Alone -
The coupon must be used alone and can not be used in conjunction with
other coupons
*Tip: To find out the product ID, simply
edit the product in admin and look at the URL. It will look like this:
YOUR_DOMAIN/wp-admin/post.php?post=**143**&action=edit
Your product ID will be after the
equals sign and in the above example, 143.
HELP/FAQ
I don’t remember my username/password/both
Contact the person who created your website and IF you have not changed either of them, they should be
able to provide you with both. HOWEVER, if you have changed your username/password
or both, follow the steps below.
1)
Click on ‘Lost your password?’
2)
Enter your username or email (you should
have both) Enter your email if you don’t remember your username
3)
Click on get new password
4)
An email will be sent to the email
account that you entered
5)
Follow the instructions in that email
6) WRITE DOWN THE USERNAME & NEW PASSWORD
SOMEWHERE YOU WILL LOOK AT FREQUENTLY
7)
Log in and follow the steps above to
update your website
I want to add in a new page
If
you are VERY SURE of what you are doing, feel free to do so. BUT, we do not
encourage doing so without help, as there might be certain codes/plug-ins
embedded in your website. These may cause your new page to be displayed in a
manner not in line with your vision. Hence, call your web developer and have him or her sort things out.
This guide is useless. I cannot update anything despite following the instructions.
Ouch.
Disclaimer:
All stock photos used in this guide are for teaching purposes only. Studious
Media in no way claims any ownership for the images used. Credits to www.shutterstock.com
for the stock photos used.